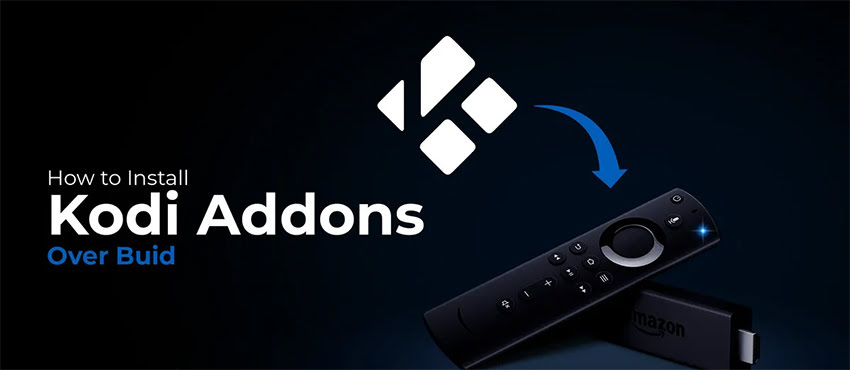
How to Install Kodi Addons Over Builds: In this guide, I’ll walk you through the steps to install any addon on a Kodi build. The method shown here is compatible with Kodi 20 Nexus and earlier versions. A Kodi build is essentially a pre-configured package that includes a variety of add-ons, tools, and utilities bundled together. It also transforms the default Kodi interface by adding custom skins and layouts, offering a more dynamic and visually appealing user experience. These builds often come with several popular addons already installed, saving you the time and effort of installing them one by one.
However, even though builds include many addons, they may not have every addon you’re looking for. Fortunately, Kodi builds still allow you to install additional addons. While the general process remains similar, the interface and navigation may differ slightly depending on the build you’re using. The purpose of this guide is to help you install addons on Kodi builds that don’t already include them. Let’s get started!
Kodi Addons and builds provide access to unlimited streaming content, but using them to watch free movies, TV shows, or sports can put you at legal risk.
Your IP address is visible to everyone. To protect your privacy, Kodi users are highly encouraged to connect to a
good Kodi VPN when streaming.
A good Kodi VPN safeguards your identity, bypasses government monitoring, unlocks geo-restricted content, and prevents ISP throttling—resulting in a smoother, buffer-free streaming experience.
I personally use
ExpressVPN, which is the fastest and most secure VPN.
It is very easy to install on any device including
Amazon FireStick.
You get 3 months free and save 49% on its annual plans.
Also, it comes with a 30-day money-back guarantee. If you are not satisfied, you can always ask for a refund.
Kodi Addons 2026
In this guide, I’ll demonstrate how to install addons on a Kodi build using the Element Reborn Build as an example. While each build comes with its own unique interface, the core functionality and navigation are generally quite similar. So even if you’re using a different build, the steps should still be familiar. Installing addons on a build works much like it does on the default Kodi interface, which uses the Estuary skin. Element Reborn is one of the most popular Kodi builds and comes preloaded with several well-known addons. If you prefer, you can choose another build from cMaN’s Wizard, which offers a wide variety. There are also many great builds available outside of cMaN’s Wizard that you can explore.
Prepare to Install Kodi Addons on Builds
Before you begin, decide which addon you’d like to install. You can choose from some of the best Kodi addons available. For this guide, I’ll be using the LiveNet addon from the LooNatics Asylum Repository. Feel free to choose a different addon, especially if it isn’t already included in the Element Reborn Build.
Privacy Alert! Your data is exposed to the websites you visit! The information above can be used to track you, target you for ads, and monitor what you do online. We recommend ExpressVPN — the #1 VPN out of over 350 providers we've tested. It has military-grade encryption and privacy features that will ensure your digital security, plus — it's currently offering 48% off. Your IP Address: Loading...
 Your Location: Loading...
 Your Internet Provider: Loading...
Next, we need to ensure that Kodi is set up to allow installations from third-party sources. Since you’ve already installed a third-party build like Element Reborn, this setting is likely already enabled. However, if you’ve turned it off at some point, here’s how to enable it again:
- Launch Kodi. From the Element Reborn Build home screen, navigate to the left-hand side menu and access the System section.
- Select System from the menu options.
- In the next screen, click on System Settings (or just System, depending on your version).
- On the left-hand side, select Add-ons. On the right, locate Unknown Sources. If it’s turned off, click the toggle to enable it.
- When prompted, click Yes to confirm.
With Unknown Sources enabled, you’re ready to install addons on the Element Reborn Build. Let me show you how it’s done.
How to Install Kodi Addons on Builds
I’ve broken down the installation process into the usual three steps:
- Part 1: Add the source URL to Kodi
- Part 2: Install the repository
- Part 3: Install the addon from the repository
Although the Element Reborn Build features a different layout from Kodi’s default Estuary skin, the core steps and options remain largely the same.
Part 1: Add the Source URL to Kodi
Follow these steps to add the source:
- On the default Kodi interface, you would typically go to Settings > File Manager. With the Element Reborn Build, you’ll find File Manager inside the System section.
- Tip: No matter which build you’re using, just locate File Manager in the settings menu.
- Click Add source (on either the left or right side—it doesn’t matter).
- Select <None> when prompted.
- Enter the source URL in the text field and click OK or Done. In this example, I’m using the URL for the LiveNet addon from the LooNatics Asylum Repository. You can use any other URL depending on the addon you want.
- Enter a name for this source. You can use any name that helps you identify it. Example: I’m using the default name INSTALL_LOONATICS.
- Click OK to confirm.
Part 2: Install the Repository
- Go back one step to the System menu and select Add-ons.
- Click on Install from zip file.
- On Kodi 19 and later, you’ll see a warning prompt. Click Yes to proceed.
- Choose the source name you added earlier. (In my case, it’s INSTALL_LOONATICS.)
- Now select the zip file that looks like:
repository.[your-repo-name].zip. - Wait for the Add-on installed notification to appear in the top-right corner of the screen.
Best VPNS For Streaming Safely
1. ExpressVPN — Best VPN With the Fastest Speeds for Smooth Streaming
Best Feature
The fastest speeds we tested, ensuring you can stream, browse, game, and torrent without interruptions
Server Network
3,000 servers in 105 countries give you fast worldwide connections
Simultaneous Device Connections
Up to 8, so you can protect your compatible devices under one subscription
Works With
Netflix, Disney+, Amazon Prime Video, BBC iPlayer, (HBO) Max, Hulu, Vudu, DAZN, and more
2. NordVPN — Best VPN With the Fastest Speeds for Smooth Streaming
![]()
Best Feature
High security features and fast speeds for a reliable connection
Server Network
5,400 servers in 60 countries for improved accessibility and connection speeds
Simultaneous Device Connections
Up to 6 devices, suitable for protecting multiple devices simultaneously
Works With
Netflix, Disney+, Amazon Prime Video, BBC iPlayer, (HBO) Max, Hulu, Vudu, DAZN, and more


Part 3: Install the Addon from the Repository
- Once the repository is installed, select Install from repository.
- Find and open the repository you just added. I’m selecting LOONATICS ASYLUM REPO.
- Choose Video add-ons.
- Select the addon you want to install. For this demo, I’m choosing LIVENET.
- Click the Install button.
- Wait for the Add-on installed notification to confirm it’s ready to use.
That’s it! You’ve successfully installed an addon on the Element Reborn Build. As mentioned earlier, the process is nearly identical across most Kodi builds. To access your new addon, return to the Element Reborn home screen, navigate to the Add-ons section, then go to Video add-ons from the sidebar. You should now see LIVENET listed alongside your other installed addons.
Stay Safe While Streaming on Kodi
Before you start streaming through Kodi addons or builds, it’s important to understand that your online activity is visible to your Internet Service Provider (ISP) and potentially your government. This means streaming copyrighted content—like free movies, TV shows, live channels, or sports—could put you at risk of legal issues.
Thankfully, there’s a reliable way to protect your privacy: using a VPN (Virtual Private Network). A VPN hides your real IP address (like yours: 2401:4900:881a:d773:edeb:4cf3:8c81:48b) and encrypts your traffic, shielding your online activities from surveillance, throttling, and geo-restrictions. I personally use and recommend ExpressVPN—it’s fast, secure, and works seamlessly with Kodi and nearly all other streaming apps and devices.
How to Set Up a VPN for Kodi in 3 Simple Steps:
- Step 1: Subscribe to ExpressVPN. It includes a 30-day money-back guarantee, so you can try it risk-free.
- Step 2: Download the ExpressVPN app on your streaming device. For FireStick users, follow the extra steps below.
- Step 3: Launch the app and click the Power icon to connect to a VPN server. That’s it—your streaming is now private and secure.
- Step 4: Subscribe to ExpressVPN if you haven’t already.
- Step 5: On your Fire TV Stick home screen, go to Find > Search.
- Step 6: Type ExpressVPN in the search bar and select it.
- Step 7: Click Download to install the app.
- Step 8: Open the app and sign in using the credentials you used during registration.
- Step 9: Press the Power icon to connect. Your FireStick is now protected by ExpressVPN.
Wrapping Up
And that’s how you install addons on Kodi—even when using a custom build like Element Reborn. If you’re using a different build, just look for similar options: To add a source, find File Manager To install a repository, go to Settings > Add-ons > Install from zip file To install an addon, use Install from repository While the appearance and navigation may vary between builds, the essential steps stay the same. The core structure of Kodi remains unchanged. How was this guide helpful for you? Got questions or suggestions? Drop them in the comments below—I’d love to hear from you!
Best VPNs for Streaming — Final Score:
Rank
Provider
Overall Score
Best Deal

9.8
★★★★★
save 84%
VISIT WEBSITE >
9.6
★★★★★
save 83%
VISIT WEBSITE >
9.4
★★★★★
save 84%
VISIT WEBSITE >